THE SOMME
In December 1915, Allied commanders held a strategy conference at Chantilly following failed Allied offences in Artois/Vimy and Champagne. The British commander-in-chief, Sir John French, pushed for simultaneous offensives to be launched as soon as possible. The British believed that the most obvious sector to attack was at the Ypres salient, being closest to the Channel ports and the British Expeditionary Force’s supply lines. However, the French, led by General Joffrey, favoured an offense farther south. At the end of 1915, Sir John French was replaced as British commander by General Haig, and in February 1916 there was agreement that the next Anglo-French offensive should be in Picardy, astride the river Somme. While this area lacked the infrastructure available in Flanders, its terrain was less likely to become waterlogged and thus better suited to infantry manoeuvre. It was decided that French forces would undertake the main attack with the British playing a supporting role. The French main attack would be led by thirty-nine divisions and 1700 heavy guns pledged by General Joffrey to the French commander in the area, General Ferdinand Foch. The attack was to begin on or before July 1, 1916. The area of operation was to be north and south of the River Somme, between Gommecourt and Dompierre. Eventually, some three million soldiers would be engaged in this fight over a front of forty-five kilometres. Of these, approximately 1.2 million were killed, wounded or missing in action.
Allied planning was upset by the surprise German attack at Verdun in early 1916. The French had to immediately divert troops to the south, so changes needed to be made to the planned Somme Offensive. Consequently, the Somme Offensive of 1916 transformed from a French-led operation to a primarily British operation. The British would attack with twelve divisions north of the Somme while the French committed a reduced force of thirteen divisions to the south.
Initially intended as an attack with limited objectives, circumstances on other fronts of the war encouraged General Haig to a more robust campaign. To the south, the French had succeeded in tying down the Germans in Verdun (although that battle was to grind on for several months) and on the Eastern Front, for the first time in the war, Russia was enjoying some success against the Austro-Hungarians. Believing the Germans were now vulnerable, Haig decided the time was right to launch a major attack along the Somme in hopes of breaking through the German line.
The British 4th Army was allocated for the Somme offensive, and the initial attacking force was English divisions as well as Newfoundlanders, Australians and South Africans. Six of these divisions had not previously seen battle. Because of this lack of experience, the British Command opted for a mass assault following a barrage, rather than employing French tactics of small-unit advances whereby advances were made by small group rushes with supporting fire, a manoeuvre known as “fire and movement.” The British attack was to occur at a walking pace. The first wave was to climb out of their trenches, advance and occupy the lead German trenches. The second wave was to pass through this line and continue the advance to the next objective. Subsequent waves would repeat this pattern. The British advance would have to be slow and deliberate as each man was required to carry a burden of at least thirty kilograms of equipment including food, ammunition and their four kilogram Lee-Enfield rifle.
The British 4th and 3rd armies under generals Henry Rawlinson and Edmund Allenby were to attack the German 2nd Army commanded by general Fritz von Below. The Allies enjoyed air and artillery superiority in this sector. German defences included three trench lines embedded in wooded and hilly countryside.
The battle plan called for a barrage curtain to fall on German lines at the start of the battle to proceed the advance of the infantry. The effective range of a barrage at that time was 3650m from the front trench; beyond that the technical ability to lift and advance the barrage with the accuracy needed to prevent shells from landing amongst the advancing infantry did not exist. At the Somme, most German positions were beyond this 3650m effective range, so infantry was committed to advance against defensive fortifications mostly unaffected by artillery attack. British Command played down this risk on the assumption that the artillery would flatten the tangle of barbed wire, silence forward German positions and entomb defenders in their bunkers. The thought was that the infantry would have a direct, unobstructed route to the German trench system and from there a path to the safety of the German reserve trenches.
But British artillery in early 1916 was not yet ready or able to fulfill the fire mission demanded of it. Newly-enlisted artillerymen and officers lacked necessary training and experience, and British guns suffered from significant technical problems. Making matters worse, British artillery shells were often not up to standard, and many of the projectiles shot turned out to be duds.
The bombardment opened as planned on June 24. QF 18-pounder guns were principally tasked with destroying German wire defences, and trench mortars and heavy howitzers joined the bombardment. Some 1.5 million shells were launched over seven days. Along with explosive munitions, the British artillery also dropped chlorine gas shells. The bombardment reached peak intensity at 6:30 a.m. on July 1. Following this, the battle moved to its next phase of infantry advance behind a creeping barrage. When the bombardment lifted, both sides knew the key to victory was to occupy the parapet that ran across the forward German trenches as soon as possible. It was the Germans, emerging from deep bunkers, who won this race.
From 7:20 to 7:28 a.m., the British detonated nineteen mines, eight large and eleven small, which tunnellers had placed under the German trenches. The Lochnagar and Beaumont-Hamel (Hawthorn Ridge) were the largest and loudest explosions ever detonated up until then (they would be surpassed by the mines detonated in June 1917 at the Battle of Messines). The explosions were heard as far away as London. Despite the disorientation caused by the mine explosions, actual damage to the German positions was comparatively light and the benefit to the attacking infantry questionable as the resulting craters became water-filled obstacles.
In many ways this was a tactically inept assault. Despite a seven-day bombardment of the German lines, most of the shells were shrapnel that had little effect on German troops dug deep into bunkers. Even at that, it is estimated that a quarter of the shells proved to be duds (more dud shells fell at the Somme than at any other Great War battlefield). Artillery failed to completely cut barbed wire barricades, and German firing platforms were mostly unaffected. Perhaps worst of all, on the night of the attack, General Rawlinson sent a message to the army wishing them luck and the Germans intercepted it, thereby eliminating any surprise.
After the barrage and mine explosions, at 7:30 a.m., the British infantry moved forward out of their trenches. Soldiers ordered over the top of the trenches on the morning of July 1 were expected to make a rapid advance across no man’s land, but carrying thirty kilograms or more of equipment across shell-pocked and uneven ground still encumbered by barbed wire made a speedy advance impossible. Infantry progress was too slow behind the artillery, leaving German troops ample time to emerge from trenches and foxholes to man machine guns.
The British attack was a disaster. Two divisions attacking in the area of Gommecourt took heavy casualties and were unable to sustain the attack past two hours. Of the sixty battalions comprising the first wave assault, approximately twenty were cut down in no man’s land. An attack uphill against the village of Serres cost 3,600 men in a matter of minutes. Every divisional attack failed, with the result that the next division in line found itself without flank support and being subject to raking fire. The few attackers that made it through to the second German trench line were killed or captured. The First Newfoundland Regiment, the only empire force committed that day, was ordered from reserve to attack Beaumont-Hamel but were slaughtered even before they left British lines. The regiment suffered 91% casualties.

Men of the Royal Irish Rifles rest during the opening hours of the Battle of the Somme. July 1, 1916.
The British barrage, intended to force Germans back from advancing infantry, was ineffective, and the infantry, through disorganization, poor communications or exhaustion, often “lost” the barrage and were unable to maintain the close advance behind the artillery curtain. As a result, even those forces most successful in penetrating German trenches were often stalled by a lack of coordinated artillery support.
In all, half of the forces sent in on the first day of the Battle of the Somme became casualties, including three-quarters of the officers. Nowhere did the advance reach its objectives on the first day of battle.
Even though both British and Germans ended up in the same trench network, actual fights between attacker and defender were rare. This is because the trenches were dug in angular kinks and “traversed” to deny direct fields of fire down a trench and to localize the effect of any shells that hit the trench. Therefore, while opposing forces might approach each other, there was little to no field of fire to attack or defend. The only way to eliminate this situation was to bombard the other side with grenades or an explosive satchel or to “go over the top” and attempt to cross over into the enemy position. Bombardment with hand-thrown explosives only worked if attackers reached the enemy immediately after detonation. This was extremely risky, and few soldiers were willing to take the chance of a mistimed attack. Traversing the area between the trenches was equally risky. The first threat was from being exposed to barrage or counter-barrage, which made the area outside of the trench extremely hazardous. The second risk was the obvious difficulty of reaching the enemy position in enough strength to overwhelm an unknown number of defenders.
Despite heavy losses in the first wave and the unexpected strength of the defence, British Command did not stop the attack and continued to order waves of men into the mouth of the beast. Most battalions attacked as ordered no matter what happened to the battalions that preceded them. This refusal to deviate from the battle plan can be explained by a dogged commitment to plan, a lack of knowledge about what was actually happening on the battlefield and, perhaps tragically, a belief and acceptance among leadership that high casualty rates were inevitable and essential to success.

A wounded man is brought in at the Battle of Albert, 1916
Courtesy of The Rooms Provincial Archives Division (NA 6067), St. John's, NL.
With the British attack stalled, once the sun went down most attackers returned to the British trenches. On the first day of the attack, the British suffered some sixty thousand casualties (twenty-one thousand killed), making this the worst day of losses in the history of the British Army. The heavy bombardment, while failing to eliminate the German ability to defend, resulted in over forty thousand casualties on the German side in the first days of the offensive.
The French assault to the right wing of the British was more successful that the British, and they accomplished their first day objectives for the most part. The French 6th Army crossed the Flaucourt Plateau and managed to pierce the German third line opposite Péronne by July 10. The French dithered, however, and failed to exploit this initial success. Seemingly unable to decide whether to continue the advance or stay put and force a battle of attrition, the French did neither, and their gains were limited. Despite the French causing serious losses to the German 2nd Army, two weeks after the start of the Battle of the Somme, German positions in front of the French were reinforced and the front line stabilized.
The Somme campaign continued until December 1916 and resulted in some 620,000 Allied and 465,000 German casualties. The Battle of the Somme, generally, was an aggregate of a series of battles during the second half of 1916. The battles that comprised the Somme Campaign after July 1 were:
The Battle of Albert is the name given to what was basically the first two weeks of the Battle of the Somme. After the first disastrous day of the battle on 1 July, the British were occupied from 2-12 July with several small, mostly inconsequential assaults. These were incremental and generally criticized as poorly-organized operations that were mostly a waste of manpower. From 2-13 July, the British absorbed a further twenty-five thousand casualties (an average of over two thousand per day). Of course, the lack of tactical planning on the part of the British did not cause the high casualty rates alone. The Germans transferred many troops from Verdun, and on July 3, General von Falkenhayn issued orders forbidding any further voluntary withdrawals from the battlefield: ”The first principle in position warfare must be to yield not one foot of ground, and if it be lost retake it by immediate counter-attack, even to the use of the last man.” Map
The Battle of Bazentin Ridge was a significant British victory occurring two weeks after the disastrous start of the Somme attack. The Welsh 38th Division took Mametz Wood on 12 July, and the Battle of Bazentin Ridge was an effort to further advance the attack and exploit a perceived gap in the German line. This phase of battle began with a three-day bombardment starting on 11 July. In the dark in the early hours of 14 July, the British 4th Army under command of General Rawlinson attacked the German 2nd Army around Bazentin le Petit Wood with five divisions. The key objectives were Bazentin Le Petit Wood, Bazentin La Grande Wood, Bazentin Le Grand as well as the village of Longueval and the adjacent Delville Wood. The British attack succeeded in capturing most of these objectives and penetrated as far as the second line of German trenches. By 9:30 a.m., Bazentin La Grande Wood, Bazentin Le Grand and Bazentin Le Petit Wood were taken, as well as much of Longueval and the adjacent Delville Wood. Commanders on the ground believed there was an opportunity to exploit a perceived gap in the German line and advance to the third line of German defences in the area designated High Wood. Authority for the infantry to press the attack was requested, but rather than assigning this assault to the infantry early in the day, British Command decided that this was an opportunity to again introduce cavalry into the field. This attack did not occur until the afternoon of the 14th, by which time the Germans had reinforced the position. As a result, the cavalry faced significant machine-gun fire. The cavalry succeeded in taking the High Wood position, and while they held the position for two days, a lack of reinforcements resulted in the position being abandoned.

The Battle of Fromelles (also considered part of the Battle of the Artois) was a subsidiary attack to exploit any weakening of German positions because of the main British attack eighty km to the south. This attack was the first major engagement for Australian soldiers on the Western Front. The Aussies, who had no real experience in trench warfare, were outnumbered 2:1 by defenders. Called “The worst twenty-four hours in the military history of Australia,” the Australians lost 5533 men on the first day of the attack. A seven-hour preparatory bombardment alerted the Germans to the pending attack and failed to destroy German positions. Troops of the 5th Australian and 61st British Divisions suffered heavy losses from machine-gun fire. While some German trench portions were captured, fierce counter-attacks and flanking fire forced the Australians to withdraw. German casualties were less than one thousand, and the attack was a complete failure.
The Battle of Deville Wood: After the failure of the initial attack in early July, the Battle of the Somme devolved into a series of efforts to capture woods, fortified villages and high ground suitable for use as staging areas for future attacks. The Battle of Deville Wood from July 14-September 15, 1916, was an effort to secure the British right flank following the success of the Battle of Bazentin Ridge. Deville Wood is adjacent to the village of Longueval, which the British had captured 14 July. This was the first action on the Western Front for the South African 1st Infantry Brigade. While objectives were met, heavy casualties were incurred. The South Africans took the southern edge of the German line on July 15 but fighting then devolved to hand-to-hand engagements made even more difficult by heavy rain and resulting muddy conditions. On 19 July, the South Africans were withdrawn. Deville Wood was finally taken by British forces, who also absorbed high casualties, in late August 1916. At Deville Wood, the South Africans suffered their highest casualties of any single battle they fought on the Western Front. The South Africans suffered 2,536 casualties by the time they were relieved, a loss of 80% killed, wounded and missing. (Deville Wood would be recaptured by the Germans in March 1918 as part of their Spring Offensive and then retaken by the 38th Welsh Infantry Division in August 1918). . Map

Soldiers resting en route to the trenches, December 1916
The Battle of Pozières was an action by the 1st Australian Division and New Zealand Army Corps. It was one of the few British successes in July 1916, and it resulted in the capture of a plateau near Pozières, overlooking the fortified village of Thiepval. After an initial bombardment, the Australians quickly took the village on 22 July. From 22 July to 4 August, Anzac forces attacked Pozières Ridge, including a twelve-hour hand grenade battle on the night of 26-27 July. The ridge was finally taken on August 4. Map, There is a DVD about the Battle of Pozieres available for purchase here book war australia.
The Battle of Guillemont (3-6 September 1916). Guillemont was on the right flank of the British sector near the French 6th Army’s area of operations. The British had made several attempts to capture Guillemont in July and August without success. Guillemont was a well-fortified German position featuring concrete emplacements, dugouts and underground tunnels. The battle was initiated on September 3, with objectives being not only Guillemont (in particular Leuze Wood situated on a ridge about 1300 meters beyond the village), but also the regions around Ginchy and north of Deville Wood. The attack was led by the 20th Division who attacked from trench lines close to the German front line. The British took heavy casualties in the first wave of attack, but eventually took Guillemont on the first day of the battle. Attacking forces on the first day had no success in taking the other objectives around Ginchy. For three more days the British pressed the attack and finally took Leuze Wood on September 6.
The Battle of Ginchy (9 September) was a successful attack by the British to capture Ginchy, 1.5km northeast of Guillemont. After the capture of Leuze Wood on 9 September, the British turned their attention to the capture of Ginchy. The British had been trying to take and hold the village for several weeks, and this attack was intended to complete this task. A bombardment began early in the morning of 9 September, but British commanders waited until late afternoon to launch an assault by the 56th and 16th Divisions. From the north flank, Ginchy was captured by the 16th Division and held despite several German counter-attacks.
The loss of Ginchy deprived the Germans of important observation posts and eliminated the British salient at Delville Wood (which had been costly to defend from German attack on three sides). With the capture of Ginchy, the British front was stabilized, and it became possible to initiate the next major battle of the Somme offensive: Flers-Courcelette. Map
The Battle of Flers-Courcelette (15-22 September 1916) was an offensive by British forces that included debuts by the Canadian Corps, New Zealand Division and tanks of the British Machine Gun Corps. The third main phase of the Battle of the Somme, the objective of this attack was to take the German intermediate and third trench lines around the villages of Lesbœufs, Morval and Gueudecourt. The British attack was launched concurrently with a French attack on Frégicourt and Rancourt. This attack did not meet its objectives, but was a tactical success, moving the British front line forward about three kilometers and inflicting heavy German casualties. It is best known as the first tank battle in history, as it featured forty-nine Mk I tanks (not all of which made it into battle).
Flers-Courcelette was the first full-scale offensive since the first day of the Somme. The attacking force included Rawlinson’s 4th Army and part of the Reserve Army (later to be designated the 5th Army) under General Gough. General Haig was convinced that after the heavy fighting in the Somme since July, and with the French enjoying some success at Verdun, it was now finally the right time to break through German defences. Still clinging to his long-standing faith in the enduring value of cavalry, Haig instructed 15th Corps to break through the German lines northeast of Flers, thus preparing a route through which the cavalry was to infiltrate into the German rear area. The British plan of attack was to break through the main German defences on a 5.6km front. Fourteenth Corps was to attack on the right flank in the direction from Combles to Morval. The 15th Corps and 3rd Corps were to attack in the centre with Fifteenth with cavalry driving from Longueval toward Flers and 3rd Corps attacking through High Wood. On the far right flank, 1st and 5th Corps were to advance toward Rancourt to provide a defensive flank. On the left flank were the Canadians, who were to attack with 3rd Corps to take positions between Flers and Courcelette and stand in reserve to exploit successes anywhere along the front. On the far left flank, 2nd Corps was to stand ready to exploit any opportunity to take ground to the south of Thiepval (where poison gas and smoke was to be released poison gas to simulate an attack). The French 6th Army was to attack from the south.
The shock power of artillery was now clear, and for the Flers-Courcelette attack a massive artillery bombardment was planned. At the start of the Somme Offensive on 1 July, the attack had been supported by one field gun for every nineteen metres of front and one heavy gun for every fifty-two metres. For this attack, artillery was much more concentrated to one field gun for every nine metres and one heavy gun for every twenty-six metres. To supply the artillery and infantry, new rail tracks were built close to the front lines. Map
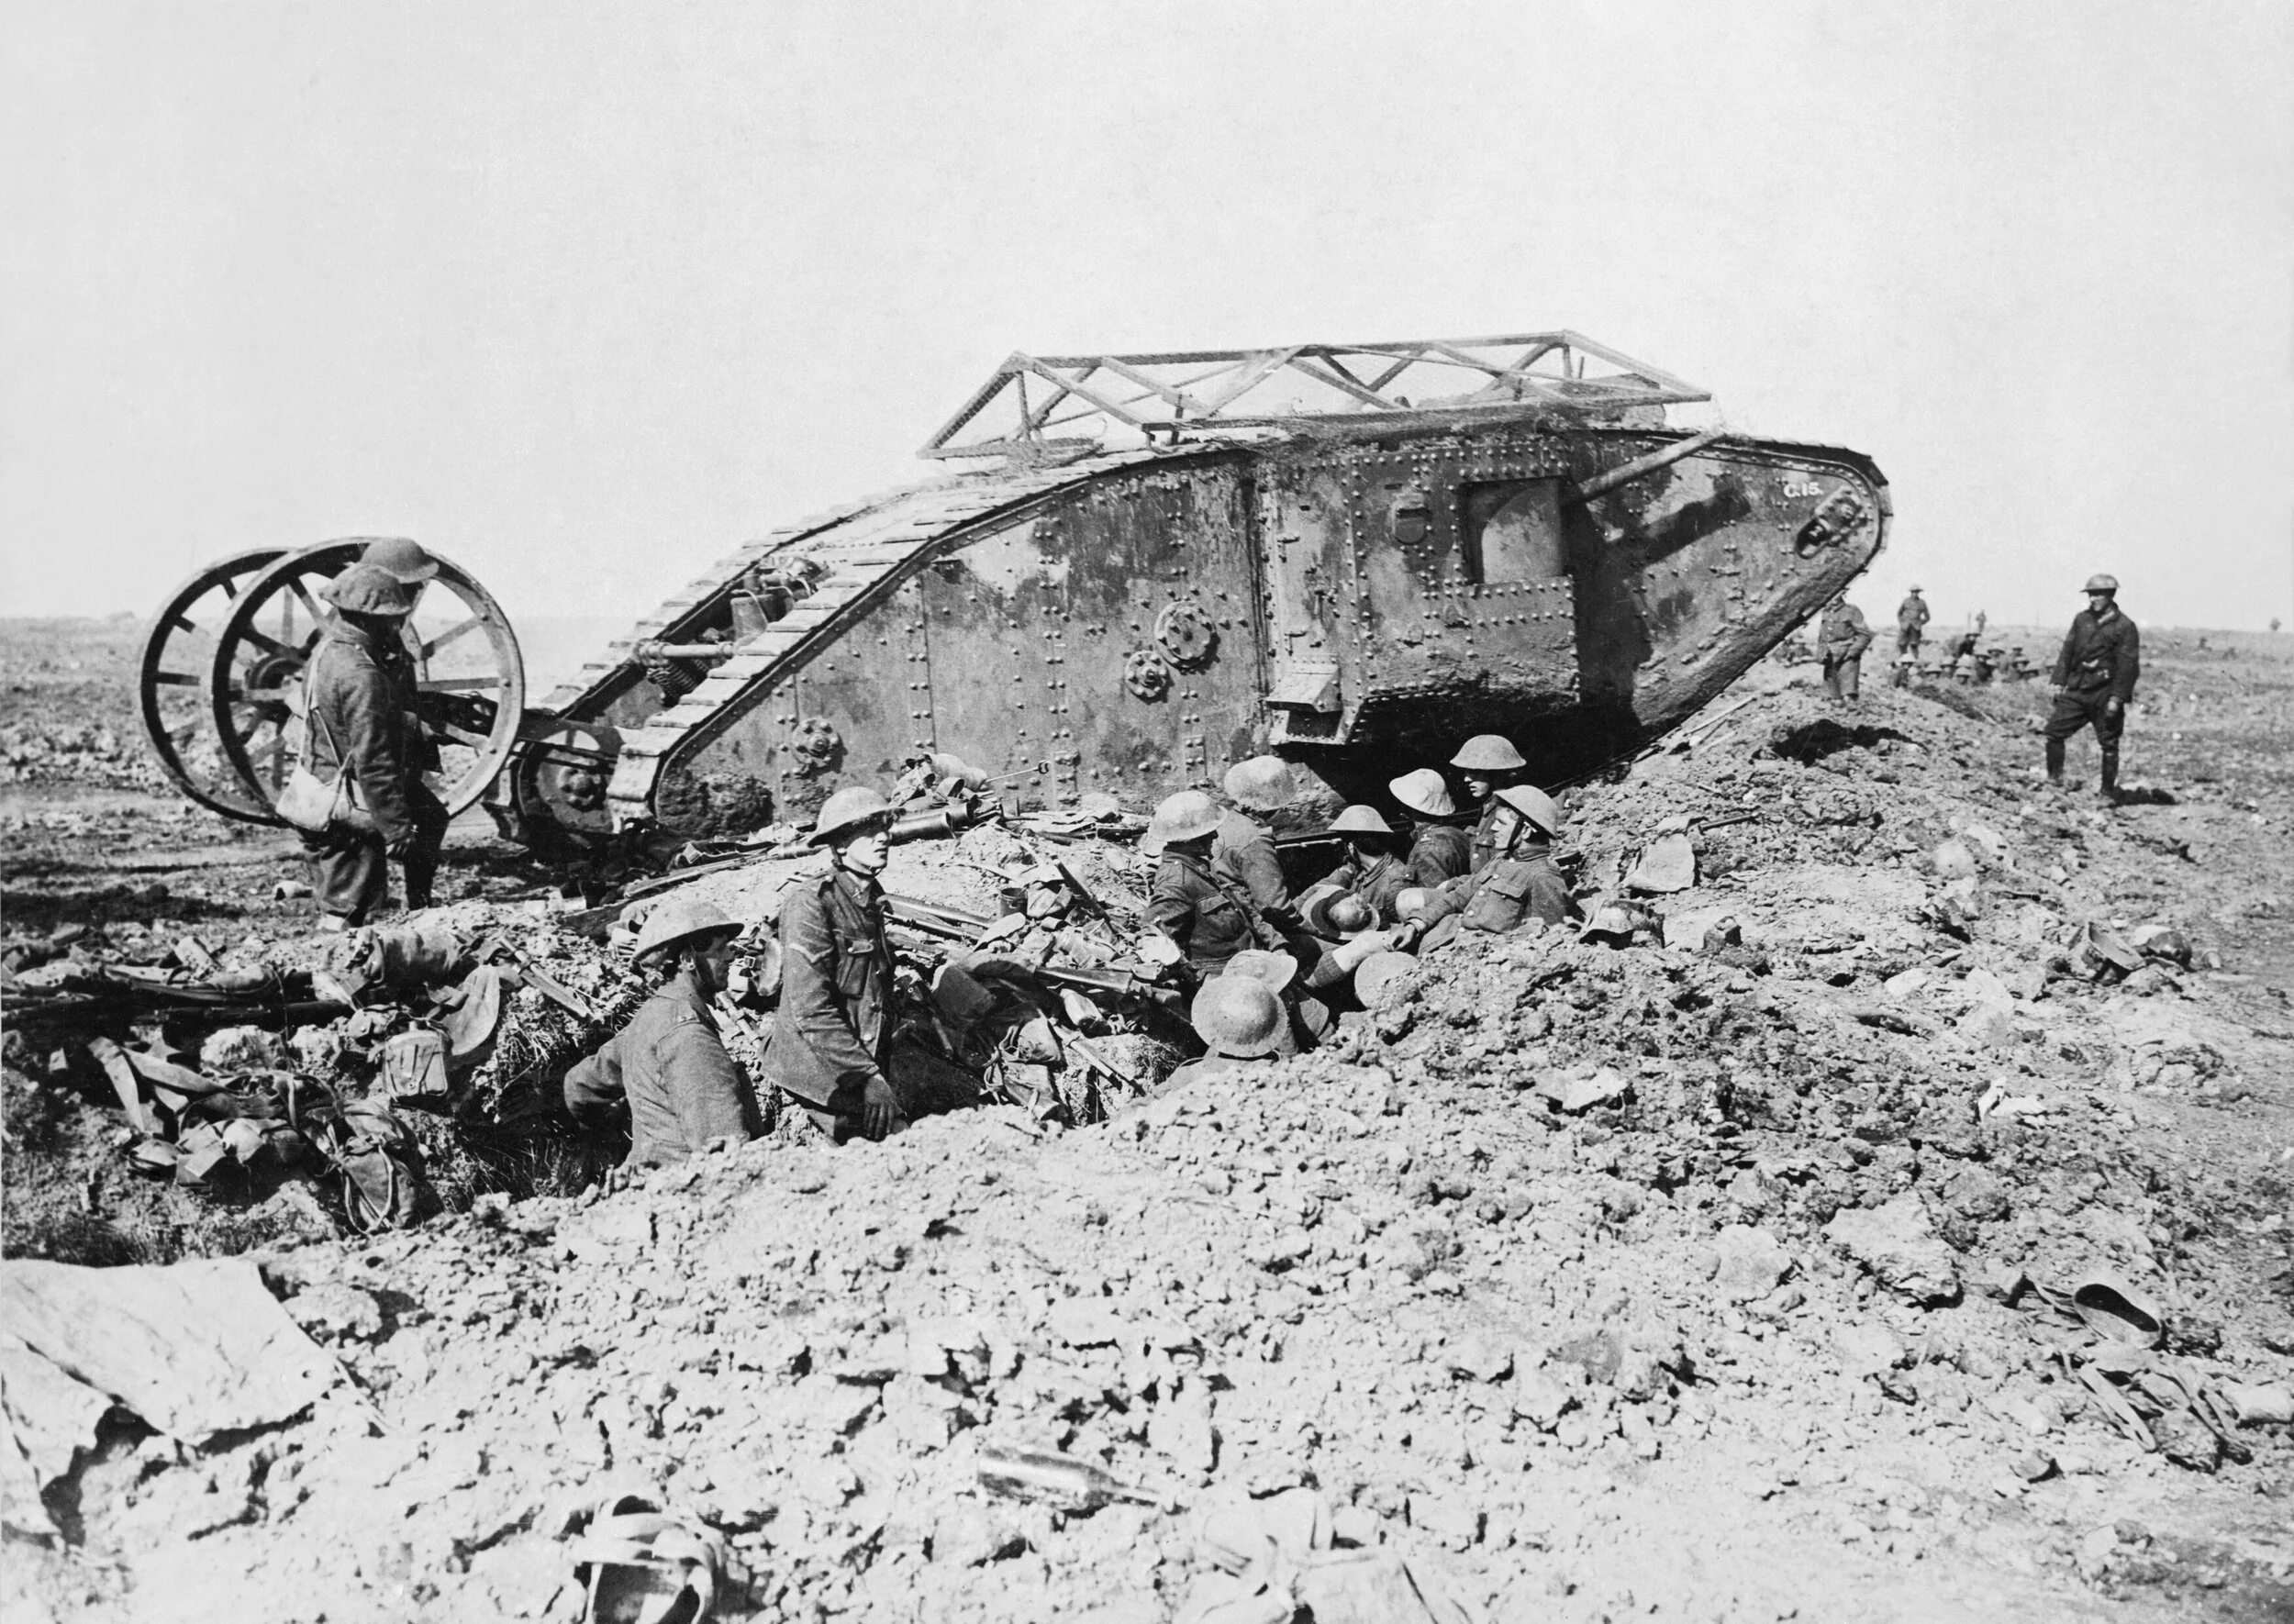
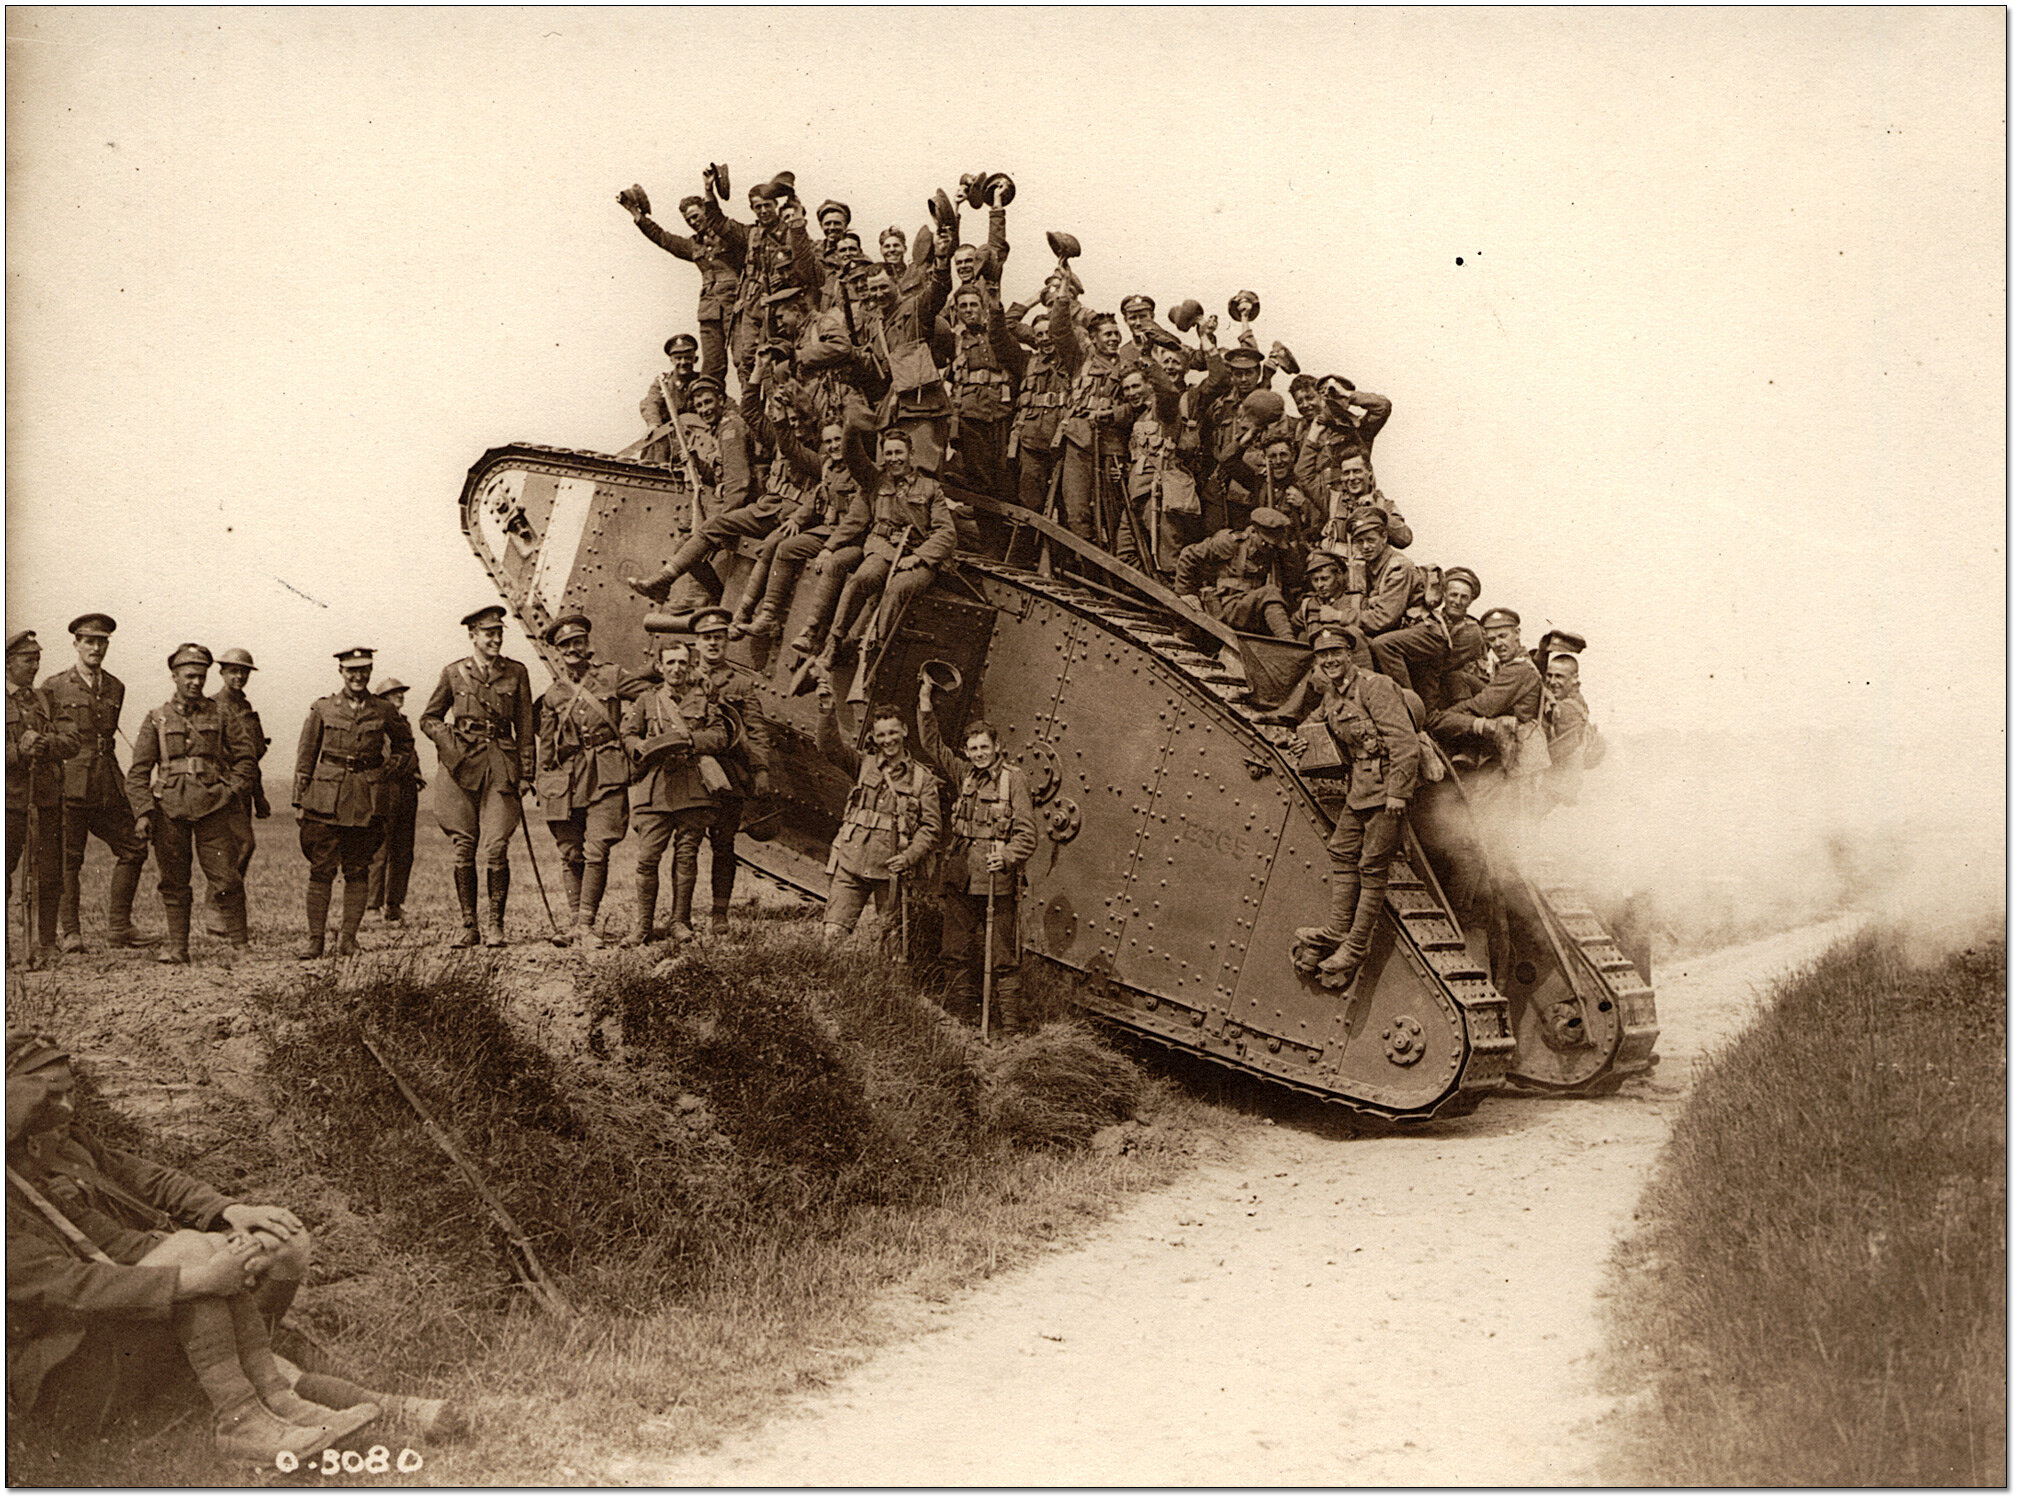
At Flers-Courcelette, tanks were to be deployed for the first time in a major attack. Developed as a tool to break the stalemate of trench warfare, the British and French were the first armies to build battle tanks. The Mark I was the first (barely) operational tank in the world. It had no turret, a low centre of gravity, a hull made of boiler panels and guns mounted in sponsons. Caterpillar tracks surrounded the hull, taking up the entire length of the machine. Propulsion was provided by a 105 horsepower, six-cylinder petrol engine, which was open to the crew cockpit. This non-compartmentalized design was needed to accommodate the vehicle’s transmission and to allow engineers easy access (as the motor was prone to frequent breakdown). This open design made for hellish conditions for the eight-man crew who were subjected to intense heat, noxious fumes (carbon monoxide, cordite, fuel and oil vapours) and noise. The crew consisted of four drivers (one for the gearbox, one for the brakes and two controlling the gears of each track) and four gunners operating six-pounder guns and/or machine guns (armaments were not standard and varied from machine to machine). While the tank was deemed “bullet-proof,” each bullet impact generated mini-shrapnel inside the compartment, often causing injuries. The crew wore protection of thick leather jackets and helmets (as well as chain mail), which served to increase their discomfort from heat. The Mark I was eight metres long and weighed twenty-eight tonnes. With that much weight, and with the muddy conditions of the battlefield, the Mark I was painfully slow Contemporary Footage of a Mark I Tank can be seen here Mark I Tank
The speed of the tanks created a major problem to integrate them with artillery. Because the tanks were so slow, they needed to advance ahead of the infantry. To address this, corridors through which the tanks could advance had to be left in the creeping barrage. This meant that in some areas German strong points would be untouched by the creeping barrage. Of the forty-nine tanks shipped to the Somme, only thirty-two were able to begin the attack and only nine made it across no man’s land to the German lines.
While the British plan for Flers-Courcelette called for intense bombardment and the introduction of tanks, the Germans had also made several tactical changes. Hindenburg issued new tactical instructions: “The Defensive Battle,” which ended the existing emphasis on holding ground at all costs and counter-attacking every penetration. The Defensive Battle called for efforts to wear out attackers using methods that conserved German infantry. The increased use of artillery and machine guns was emphasized as was defence in depth to protect rear areas from Anglo-French firepower. The Germans also began building the Siegfriedstellung, a new defensive system 24-32km behind the Noyon Salient (which became known as the Hindenburg Line) to make a strategic withdrawal and consolidation of the German line possible.
While French success at Verdun may have given Haig some confidence that the British would have success on the Somme, the cessation of German attacks at Verdun allowed German reinforcement of the Somme front. More guns and aircraft were moved from Verdun to the Somme, and the Germans established relief divisions about twenty km behind their lines, ready to replace the front divisions.
For the Battle of Flers-Courcelette, about five German divisions of the 1st Army were opposite the British 4th Army, consisting of the 2nd Bavarian Corps, 4th and 5th Bavarian Divisions, 3rd Bavarian Corps, 50th Reserve Division and 6th Bavarian Division. There were three trench systems:

A Brigadier and his staff outside Tank 17 of D Company, which was used as his Headquarters. Near Flers, 21st September 1916. © IWM (Q 2487)
a. The front line was Foureaux Riegel (Switch Trench), located about 460m across no man’s land, along the south face of Bazentin Ridge.
b. About 910m farther back from Bazentin Ridge was Flers Riegel (Flers Trench) in front of the village of Flers.
c. Another 1,400m back lay Gallwitz Riegel (Gird Trench) in front of Gueudecourt, Lesbœufs and Morval.
Two and a half months of shelling had turned the battlefield into a mess of craters, barbed wire, collapsed dugouts and partial trenches. As part of the Defensive Battle strategy, instead of using formal trenches, German infantry was dispersed 18-20 meters apart in groups of twos and threes occupying shell holes and other cover instead of linked trenches. Supporting units occupied similar positions to the rear.
After the preliminary barrage, the Battle of Flers-Courcelette began at 6:00 a.m. on 15 September. Following the artillery attack, the infantry advanced. The results were mixed. On the right flank, 14 Corps accomplished little: its attack soon bogged down, and great difficulty was caused by a strong German position known as the Quadrilateral, north of Leuze Wood. Despite bitter fighting, little progress was made. 15th Corps had more success but failed to achieve the hoped-for breakthrough. The 14th Division began their attack early as they had to clear a pocket of Germans east of Delville Wood before the main attack could begin. With the support of a single tank, this pocket was cleared, even though every officer in the attacking group became a casualty.
With the Deville Wood pocket neutralized, all three divisions of the 15 Corps (14th, 41st and New Zealand Divisions) attacked and managed to reach their objectives. Their attack was supported by fourteen tanks. In the centre, 41st Division had the job of capturing Flers, and was given the most tanks. The village of Flers was captured early in the day. One of the tanks played a major role in the advance on Flers, driving up the main street of the village with the infantry following on behind. 15 Corps advances petered out just beyond the village. No-breakout would occur there.
3rd Corps and the Canadian Corps also had a successful day on September 15: 3rd Corps captured the village of Martinpuich and cleared High Wood while the Canadians reached all of their first day objectives and captured the village of Courcelette. The attack was renewed on 16 September without any real success. All along the line attacks bogged down. The bombardment in support of 15 Corps’ attack proved ineffective and a supporting tank was destroyed by artillery fire. 3 Corps also made little progress. The attack paused on August 17, and while British command intended a general resumption of the attack, this was repeatedly delayed, in part due to heavy rain which began on 18 September. From 17-23 September the battle devolved into a series of small-scale operations designed to consolidate the line, especially in the area around High Wood.
The Battle of Flers-Courcelette was mostly a limited British success, but despite pushing back the German line, no breakthrough was achieved. Flers-Courcelette saw the entry of tanks into the theatre of battle and their potential utility in battle was noted. Both the British and French devoted serious resources for the development of tanks after Flers-Courcelette, which investment would pay dividends a little over a year later at the Battle of Cambrai. An academic article about the use of tanks at Flers-Courcelette can be found here Tanks at Flers-Courcelette.

Canada Department of National Defence. Library and Archives Canada. PA-000128
German trench demolished by artillery, showing a dead German soldier. July 1916
The Battle of Morval (25-28 September) was an attack by the British 4th Army to clean up and consolidate the advances made in the Battle of Flers-Courcelette. The attack was carried out in conjunction with an attack by the French Sixth Army to the south on Combles. Lesbœufs, Morval and Gueudecourt were taken, completing the capture of the third line of German defences.
The Battle of Thiepval Ridge (26-28 September 1916) was the first solo attack by the Reserve Army under the command of Lieutenant-General Hubert Gough. This attack was coordinated to assist the actions of the 4th Army to take Morval. Thiepval Ridge was a strong German position and well defended. The British attack in September failed (although the ridge was later captured in the Battle of the Ancre Heights in October-November). The Battle of Thiepval Ridge saw British experiments in the use of poison gas, machine-gun bombardment and co-ordinated attacks between tanks and infantry.
The Battle of the Somme was particularly hard on the Germans in September 1916: they suffered about 130,000 casualties. Combined with the losses at Verdun and on the Eastern Front, the German Empire was brought closer to military collapse than at any time before the autumn of 1918.
The Battle of the Somme limped along for another six weeks. While the Battle of Morval saw the occupation of the third line of German defences, a fourth line had been established along the Transloy Ridge (beyond which fifth and sixth lines were under construction). Still hoping for a breakthrough, General Haig sent the Fourth Army to take the German fourth line in the Battle of Le Transloy (1 October-11 November). The attack got off to a good start with the capture of Eaucourt l’Abbaye and an advance toward Le Sars. After a few days pause, the advance resumed on October 7, and the Allies took Le Sars over the next few days, but little else. The French 10th Army also attacked and recovered some ground around the south bank of the Somme and toward Pressoir and Fresnes. A determined German counter-attack on October 21 effectively ended the advance. The weather deteriorated rapidly in mid-October, and the battlefield terrain, previously churned by shelling, became virtually impassable and attacks bogged down. .
The Royal Newfoundland Regiment's participation in the Battle of Le Transloy is commemorated with the Gueudecourt Newfoundland Memorial. The memorial marks the place where the Newfoundlanders returned to the Somme in early October after heavy losses four months earlier in the 1 July attack at Beaumont Hamel on the first day of the Battle of the Somme. The rebuilt Newfoundland Battalion played a decisive role in the capture of a German strong point named Hilt Trench, northeast of Gueudecourt village. The memorial also marks the farthest point of advance that any British unit made from the original front lines during the Somme offensive
The Battle of the Ancre Heights/Ancre (1 October-11 November and 13-18 November) was the final significant fight of the Battle of the Somme in 1916. The first assault was an attack by the British Reserve Army from Thiepval Ridge and Beaumont-Hamel to take the Regina Trench and Stuff Trench north of Courcelette and so secure the Ancre Heights. Fresh German divisions provided stiff resistance. The second assault was to consolidate advances and take the Ancre Valley. The Reserve Army (now renamed the 5th British Army) opened the attack by detonating a massive mine beneath Hawthorn Ridge Redoubt. A subsequent attack on Serre failed, but Beaumont-Hamel and Beaucourt-sur-l’Ancre were captured. The Canadian 4th Division took Regina Trench north of Courcelette and then also Desire Support Trench.
THE END OF THE BATTLE
From November 18- to January 1917, the Battle of the Somme took a lull before ending in March 1917. After further advances by the British Fifth Army in the Ancre Valley in February 1917, German forces between 9 February and 20 March 1917 withdrew to the Seigfriedstellung (the Hindenburg Line) in “Operation Alberich”, abandoning the Somme battlefield. The Battle of the Somme was over.
The withdrawal of the German forces in the Somme as part of Operation Alberich is the inspiration for the 2010 film “1917”. While this is a terrific movie, it suffers from a few historical inaccuracies: the film is set in the spring when the withdrawal actually occurred in February; the fateful attack by the Devons would never have taken place without considerable artillery support and the mixing of Sikh and black soldiers in the regiments is highly unlikely (the Devonshire Regiment was never brigaded with West Indian or African Units, who were actually grouped together in the British East Indies Regiment). Societal norms of the time kept minority soldiers separated from white troops.
Some Images from the battle can be viewed here Somme Images, and here is some film footage youtube
The result of the Battle of the Somme in 1916.
The Battle of the Somme introduced many British forces to trench warfare, including the Kitchener Army of volunteer recruits from the start of the war, the Canada Corps, Newfoundland, Australian Imperial Force, New Zealand and South African divisions. It also saw experimentation and education in the use of machine guns, tanks, barrage and assault tactics by the British. It also saw horrendous British losses.
For Germany, the Somme (combined with Verdun) saw a decimating loss of trained regular soldiers and reservists. Despite this, Germany was still able to withstand the major Allied offenses to follow in 1917. The loss of men resulted in Germany adopting the Defensive Battle strategy and ultimately the construction of a new defensive line behind the Somme Front from Arras to Saint-Quentin, La Fère and Condé, to be dubbed the Seigfriedstellung (the Hindenburg Line). Another new line was also built between Pont-à-Mousson and Verdun.
Total French and British losses at the Somme were about 624,000, including 146,000 killed and missing. German losses are less precisely known and range from 460,000 to 600,000 including 164,000 killed and missing.
While General Haig had persisted in a belief that a breakthrough could be achieved at the Somme, the only real strategic effect of the Battle of the Somme was to divert German forces away from the Battle of Verdun waging to the south.

THE SOMME TODAY
French tourism authorities have established a “Remembrance Trail” that passes by most of the significant Battle of the Somme memorials and museums. The trail begins at Péronne, then passes through Rancourt, Longueval Courelcelle, Poziers, Thiepval, Hamel and Albert. Some of the stops suggested on this Remembrance Trail are quite inconsequential. For this reason, while the route for the Remembrance Trail is generally followed below, you should take note of the scores given to these stops and adjust your tour plans accordingly. somme circuit-of-remembrance
The start of the Remembrance Trail is the town of Péronne, which was occupied by the Germans for the entirety of the Great War. The civilian population of Péronne suffered terribly during the war, and so in remembrance, the bells of the mairie ring out ”La Madelon,” a popular song of the Great War, every day. The Museum of the Great War in Péronne Map contains a collection of exhibits and objects demonstrating what life was like in the trenches and providing an overview of the Battle of the Somme. Included is trench art, posters and, interestingly, a collection of war-related toys. There is a Saint-Chamond tank in the courtyard of the museum. The museum is built within the old mediaeval castle, and for this reason alone is worth a visit. Budget 1.5 hours. Rank8. https://www.historial.fr/en/
Nearby Péronne is a statue of an Australian “Digger” and a historical walking trail and peace garden. Map A quick stop. Rank 6
Rancourt: The capture of Rancourt by the 32nd French Army Corps was important for the disruption of German communication lines along the Bapaume-Péronne Road. There are three cemeteries located in Rancourt (British Map , French Map and German Map). If you are curious about the cemeteries, stop at one or more. Budget 15 minutes.
Deville Wood: South African soldiers fought against elements of the German 4th Army Corps for five nights and six days in July 1916. Outnumbered and surrounded on three sides, the South Africans took many casualties but managed to continue fighting, at times hand to hand. The woods were replanted in the 1920s and today hosts the Deville Wood South African National Memorial. Map The Museum to the South African Forces is at the same site. The grounds here are extensive and well groomed. Rank 7 SF Deville
The New Zealand Memorial at Longueval (Caterpillar Valley Memorial): On Friday, 15 September, 1916, the New Zealand Division joined the Battle of the Somme near this place. Map Rank 6
Gueudecourt Newfoundland Memorial: Map Located at the very position where in October 1916, during the Battle of Le Transloy, the Newfoundland Regiment played a decisive role in the capture of a German trench. The memorial features a statue of a caribou, the emblem of the Newfoundland Regiment. While the statue is impressive, you will see a copy of it at the Beaumont-Hamel Newfoundland Memorial and there is not much else to see at the Gueudecourt Newfoundland Memorial. Yes, you are at a former battle site, but all you are going to see when you look about are farm fields. Rank 3
Pozières was a key position to be taken to advance and take Thiepval Ridge. Pozières lays along a ridge that was crossed by a double network of trenches and flanked by two fortified observation posts (“Gibraltar” and “The Windmill”). The Australians captured the village on 23 July 1916 but lost a third of their men in the attack. The village itself was destroyed. There are four stops here, all of which are not particularly interesting, although the Tank Corps Memorial makes for a pretty good photo stop. The Gibraltar Blockhouse Map and 1st Australian Division Memorial\The Windmill, Tank Corps Memorial and a memorial to animals that died during the Great War are also here. Map There is an “Australians at Poiziéres” App available for download here: AUS - Google Play
Thiepval was a significant position during the Battle of the Somme as from its height the Germans could dominate the valley below. The Germans built an impressive line of defences around the village, including a maze of gun emplacements, bunkers and communication trenches. The village was captured on 27 September.
The Thiepval Memorial Map commemorates 72,205 men from the British and South African armies declared missing in the Somme between July 1915 and March 1918. It is an impressive 45 meters high, making it the tallest Commonwealth war memorial in the world. Nearby are the “Gardens of Peace “. Rank 8. thiepval-memorial
The Thiepval Museum opened in 2016 and features a panorama of a single day of the Battle of the Somme presented along a backlit, sixty-metre strip. There is also a glass-topped exhibit of a trench along with artifacts and screens playing archival footage as well as an area dedicated to pilots and a replica of a Nieuport airplane. Map thiepval-museumt Rank 7
Ulster Tower and Connaught Cemetery. On the first day of the Battle of the Some, men from the 36th Ulster Division went into action in this area and took a German strongpoint called the “Schwaben Redoubt.” The division suffered over five thousand casualties that day, and the Ulster Tower is dedicated to the memory of these men. It is a replica of Helen’s Tower from the Clandeboye Estate in Ireland. A few yards away from the entrance to the Ulster Tower, down a track leading downhill from the road across fields, the remains of a German machine-gun post can be seen. This gives you a good idea of the location of the German line, which was at the edge of Thiepval Wood that lies to the southwest of the road between the Thiepval Memorial and the Ulster Tower. Near the Connaught Cemetery is a privately-owned area of land where a section of the front-line trench has been excavated. You can also see a bunker, shell holes and a large crater. .Map Rank 7.
Beaumont-Hamel is comprised of the three villages of Beaumont, Gare-de-Beaumont and Hamel. On July 1, men of the 1st Newfoundland Regiment attacked positions here but were cut down in droves by German machine-gun fire. Eighty-six percent of this force were killed, wounded or reported missing. The Beaumont-Hamel Newfoundland Memorial is dedicated to the regiment and covers some thirty hectares of land. The highlight of this is the Caribou Memorial. The caribou was the emblem of the Newfoundland Regiment. Three bronze plaques at the base of the Caribou Memorial commemorate the men from Newfoundland who died during the Great War and whose bodies were never recovered. There is also an orientation table that will help you get your bearings. The “Danger Tree“ is a single tree that survived the devastation here despite being situated in an exposed position. This is an interesting site, and there are Canadian university students on site to give free tours. Budget one hour. Map Rank 10.
La Boisselle: The attempted capture of La Boisselle was part of the first week of the Battle of the Somme. The 34th Division of 3rd Corps suffered high casualties here. Lochnager Crater, the site of a massive mine detonated July 1 at 7:30 a.m., is nearby. At ninety-one metres in diameter and twenty-one metres deep, it is the only major mine crater accessible to the public. The area here still contains the undiscovered remains of German, French and British soldiers. Every July 1 at 07:28 a.m., there is a ceremony held here to commemorate the Battle of the Somme. Map lochnagarcrater Rank 7
The Somme 1916 Museum in Albert. Through a ten-metre-deep, two hundred fifty-metre-long tunnel you can explore life as it was in the trenches. At the end of the museum there is a public garden and arboretum. The museum is quite well done and provides a good historical overview. Budget 1.5 hours. Map musee-somme-albert.
Next to the Somme 1916 Museum is the Basilica Notre-Dame de Brebières. This structure was built in the late 1800s on the site of an earlier parish church. It was destroyed during the Great War and rebuilt in 1931. The interior of the basilica contains several quality mosaics and stained-glass windows.
Albert was heavily damaged during the war by bombardment. The town was completely rebuilt in an art deco style in the 1920s and 30s.
Other Significant Great War Sites/Memorials in the Somme Valley
Froissy Little Train and narrow-gauge railway museum: This train is run as a heritage railway and is also known as P’tit Train de la Haute Somme. It is the last survivor of the 600mm narrow-gauge trench railways of the WWI battlefields. The Musée des chemins de fer Militaires et Industriels (Military and Industrial Railways Museum) is located near the line terminus in the hamlet of Froissy and features a large collection of 600mm gauge railway material, steam engines, diesel engines and wagons in an 1800m² exhibition hall. Map appevaclub
To the south of the Somme Battlefield sites is the Cantigny American Monument (Battle of Cantigny 28-31 May 1918). This battlefield monument commemorates the first large offensive operation by an American division during World War I. It stands in the centre of Cantigny, which was captured during that attack. Map. cantigny-american Rank 2
The Mametz Welsh Dragon is a memorial overlooking Mametz Wood. On 7 July 1916, the 38th Welsh Division was tasked with taking Mametz Wood, and in particular a position known as the “Hammerhead.” Despite best efforts, the Welsh suffered close to four thousand casualties and failed to take the position before being relieved. The dragon sculpture erected in memorial here faces from the direction the 38th Welsh Division attack occurred. The dragon is depicted breathing fire and grasping a piece of barbed wire. You can also take a walk into Mametz Wood. Map Rank 6. Dragon Video
The Australian National Memorial and Sir John Monash Centre: On high ground adjacent to the small French village of Villers-Bretonneux at the rear of the Villers-Bretonneux Australian WWI War Memorial is the Sir John Monash Centre, a state-of-the-art visitors’ gateway to the Western Front. Only a few years old, this is an excellent facility dedicated to Australians who fought in the Great War and to General Sir John Monash, an Australian military commander of the First World War. He commanded the 13th Infantry Brigade before the war and then, shortly after its outbreak, became commander of the 4th Brigade in Egypt, with whom he took part in the Gallipoli Campaign. In July 1916, he took charge of the newly-raised 3rd Division in northwestern France, and in May 1918 became commander of the Australian Corps. Monash planned the successful Allied attack at the Battle of Amiens on 8 August 1918, and it was spearheaded by British forces including the Australian and Canadian Corps under Monash and Arthur Currie. Monash is considered one of the best Allied generals of the First World War and the most famous commander in Australian history. Map sjmc Rank 10
The Australian Corps Memorial, Le Hamel is on a hill east of Le Hamel village to the south of the River Somme. The memorial park commemorates the five Australian divisions that saw service in Belgium and France from 1916-1918.The memorial is located on the site of the final objective of the Battle of Hamel on 4 July 1918. This was the first attack planned and carried out by General Sir John Monash, commander of the Australian Corps. In August 1918, this site was a staging point for Allied attacks in the Battle of Amiens. There are information panels with text, maps and illustrations to tell the story of the successful Battle of Hamel (4 July 1918) along the path. The remains of a section of trench that was left in place after the war has been incorporated into the memorial site. Map battles hamel Rank 4
Amiens – For travel information about Amiens, please see the “Battle of Amiens”.
Other Somme Valley Sites of Interest
Biking, paddling or boating along the River Somme. There is a 120 km cycle track along the River Somme from Péronne to the Baie Estuary. There are restaurants and accommodations located along the route. You can also canoe or kayak along the river or hire a boat to travel in style. .visit-somme
To the south of the Somme, between the Somme and the Aisne, is the fortified town of Coucy-le-Château-Auffrique. It features a thirteenth-century castle with imposing ramparts, a wall walk and three fortified doors. It is listed as an historic monument. It is a priority destination for fans of the medieval. The castle is at the west end of the town atop a rocky spur overlooking the Oise and Ailette valleys. Nearby is the Soissons Door and the Church of St. Saviour. The approach to the church also offers a pretty view of the surrounding countryside. In July, the town hosts Coucy à la Merveille, a medieval sound and light show performed within the castle Map chateau-auffrique Rank 9
The Musée de l’Épopée et de l’Industrie Aéronautique is near Albert. This is a private collection of vehicles and aircraft. There is a Dakota C-47 transport aircraft, a Mirage III fighter and an assortment of other aircraft, vehicles and machines in the collection. The museum is only open Saturdays. Map musee-eia Rank 5
In Abbeville is the Musée Boucher-de-Perthes. Housed in a belfry, the museum collection includes sculptures and paintings from the fifteenth to nineteenth centuries. The survival of this collection is amazing given that the town was destroyed by bombing in May 1940 Map musee-boucher-de-perthes. . Rank 6